
Did you know the average family uses 24 rolls of plastic wrap annually? This creates a significant amount of plastic waste in kitchens. Making your DIY beeswax wraps is a simple, eco-friendly way to store food and reduce waste.
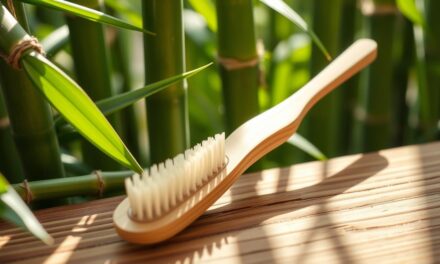
In just 10 minutes, you can create your DIY beeswax wraps. These wraps are moldable, slightly sticky, and reusable, making them a perfect alternative to plastic. Made from organic cotton, beeswax, jojoba oil, and pine resin, they keep food fresh while offering natural antibacterial properties.
Learning to make DIY beeswax wraps is part of a more significant movement toward sustainable living. It’s about choosing reusable, eco-friendly options over disposable plastics. Let’s explore the benefits and materials needed to create your wraps!
What Are Beeswax Wraps?
Beeswax wraps are a natural, reusable option for your kitchen. They are made from beeswax, coconut oil, or jojoba oil, and pine resin on cotton fabric. This makes them pliable and breathable, perfect for keeping food fresh without plastic’s harmful chemicals.
These wraps are great because they’re biodegradable. Unlike plastic, they don’t pollute the environment. They come in various sizes, like 10 x 10 inches, 12 x 12 inches, and 14 x 14 inches. This means you can use them for many different foods.
Making beeswax wraps is a fun DIY project. You can make 2 to 3 wraps with about 1 ½ yards of cotton fabric. You’ll need beeswax pastilles, pine resin, and organic jojoba oil. This mix helps them stick well and last longer. With the right care, they can last up to a year.
If your wraps lose their stickiness, you can wax them again. This makes them last even longer. Beeswax wraps are a smart choice for anyone looking for eco-friendly kitchen solutions.
Benefits of Using Beeswax Wraps
Switching to reusable beeswax wraps is great for your kitchen and the planet. They help cut down on single-use plastic waste. In the U.S., families use about 500 Ziploc bags a year, adding to plastic pollution.
A single set of beeswax wraps can replace over 200 plastic baggies. This is a big step towards reducing waste.

Environmental Benefits Of Reusable Beeswax Wraps
Beeswax wraps are good for the environment and your wallet. They can last up to a year and be used around 200 times. This means you save money and keep food fresh longer.
They keep food fresh because they breathe. This might even cut down your grocery bills by reducing food waste.
Beeswax wraps have natural antimicrobial properties. They keep your food safe and healthy. Unlike plastic wraps, they don’t have harmful chemicals.
They are also 100% compostable. They break down into natural elements in a few months. Plastic, on the other hand, takes hundreds of years to decompose.
Choosing reusable beeswax wraps shows you care about the planet. It’s a step towards a cleaner, healthier world. Make the switch today and enjoy the many benefits they offer.
Materials Needed for DIY Beeswax Wraps
To start making beeswax wraps at home, collect the necessary items. These are simple and eco-friendly.
Here are the DIY supplies you’ll need for a great project:
- 100% Cotton Fabric: Choose organic fabric for the best results. One yard makes several wraps.
- Beeswax Pellets: You’ll need about one ounce for each 12″x12″ wrap. This makes five wraps with 5 ounces.
- Jojoba Oil: Use a small amount (1/2 teaspoon) for flexibility.
- Pine Resin: Add about 1 1/2 teaspoons for extra stickiness.
- Scissors: Use good quality pinking shears to avoid fraying.
- Brush: A cheap paintbrush or pastry brush works great for applying the wax.
- Oven: Heat it to 225°F for melting the wax mixture well.
- Cookie Sheet and Parchment Paper: These keep your area clean while baking.
With these sustainable materials, following the beeswax wrap instructions will be easy. Enjoy making wraps that are good for the planet and useful in your kitchen.

Beeswax Wrap Instructions
Choosing the Right Fabric for Your Wraps
Choosing the right fabric is key for making effective beeswax wraps. The cotton fabric choice greatly affects how well your wraps work. Look for lightweight, breathable materials that can hold the wax well. 100% cotton is a top pick because it’s biodegradable and absorbs wax easily.
When picking fabric types for beeswax wraps, aim for a weight of 110-150 gsm. A 120 gsm fabric is perfect for great performance. Spoonflower Cotton Poplin, at about 112.4 gsm, also works well and has fun patterns.
Washing your fabric before use makes the wax stick better. This step is very important for your wraps to last longer. Make wraps between 9×9 inches and 15×15 inches, depending on what you need. Using a fat quarter of fabric can help you make the right sizes without wasting any.

Choosing The Right Fabric For Beeswax Wraps
For a fun group project, get 12 craft brushes to help apply wax evenly.
To make 4 wraps, you’ll need:
| Ingredient | Amount |
|---|---|
| Jojoba Oil | 3 teaspoons |
| Beeswax | 100 grams |
| Pine Resin | 20 grams |
Choosing the right material is more than just looks. Many prefer cotton over linen for storing food. Cotton is great for cheese, but remember, beeswax wraps aren’t for meat. By following these tips, you’ll have a great time making your beeswax wraps.
Preparing Your Beeswax Wraps Tutorial
Making your own beeswax wraps is a fun and green project. It begins with washing and cutting fabric into different sizes. Use 100% cotton, hemp, or linen for the best results. These natural fibers soak up beeswax well, making your wraps effective and long-lasting.
For small items, use sizes like 7×7” or 8×8”. A medium size of 10 or 11” square is great for bowls or sandwiches. Large wraps, 13 or 14” square, cover sandwiches or baking dishes. For extra large items, choose 16” or more for big bowls and loaves.

Beeswax Wrap Preparation
Having a tidy workspace helps the process. Keep all your materials close for easier work. The DIY guide involves melting beeswax, pine resin, and jojoba oil. Heat your oven to 180°F and let the wax warm up for 5 minutes. Bake the wraps for 2 minutes on each side.
For a standard batch, use 1/2 cup of beeswax pellets and three tablespoons of pine resin. Add one tablespoon of jojoba oil for better pliability. Remember to use about 25% less beeswax than shown to keep the wraps flexible.
This method helps reduce plastic waste and keeps food fresh. Each wrap takes about 10 minutes to make. It’s easy to fit into your daily routine and is good for the planet.
DIY Beeswax Wraps: Step-by-Step Instructions
Follow this DIY guide to make your own sustainable beeswax wraps. Making your own wraps cuts down on plastic waste and can save you money. Let’s get started on how to make these eco-friendly wraps.
Step 1: Gather Your Supplies
First, gather all the materials you need for your beeswax wraps.
You’ll need:
- 100% cotton, hemp, or linen fabric.
- Beeswax pellets (about 3.5 ounces).
- Pine rosin (0.7 ounces).
- Jojoba oil (1 tablespoon).
- Double boiler.
- Baking sheet.
- Parchment paper.
- Brush for applying the wax.
Step 2: Preheat the Oven
Next, heat your oven to 300°F (150°C). This temperature ensures the beeswax melts evenly, sticking well to your fabric.
Step 3: Melt the Beeswax Mixture
In your double boiler, mix the beeswax pellets, jojoba oil, and pine rosin. Heat it until everything is melted and mixed well. This step is key for the right wrap consistency.
Step 4: Prepare the Fabric
Now, lay out your fabric. Place it on a baking sheet covered with parchment paper. Cut it into sizes like 8×8 inches for small, 10×12 inches for medium, and 14×14 inches for large wraps.
Step 5: Apply the Wax
With the wax mixture melted, brush it evenly over your fabric until it’s fully saturated. Then, put the fabric in the oven for a few minutes. After that, let it cool and your wraps are ready to use!
Size, dimensions and usage chart:
| Size | Dimensions | Usage |
|---|---|---|
| Small | 7×8, 7×9, or 8×8 inches | Ideal for small items or half sandwiches |
| Medium | 10×11, 11×11, or 10×13 inches | Great for covering average bowls |
| Large | 13×13, 13×14, or 14×14 inches | Perfect for larger items like full sandwiches |
Tips for Perfecting Your Beeswax Wraps
To get the best results with your beeswax wraps, consider these practical tips. Start with a smaller amount of beeswax. This makes it easier to add more if needed, avoiding excess. If your wraps seem too stiff, adjust the beeswax ratio. If they’re too sticky, reduce the pine resin.
Explore different fabric sizes and patterns to find what works best for you. Common sizes include 5×5 inches and 8×8 inches, perfect for various food storage tasks. Always use a low heat setting when reheating your wraps. This keeps your materials intact and prevents melting.
Add some beeswax wrap tips to your crafting arsenal by considering the following:
- Experiment with fabric types; 100% cotton works best.
- Use cool water and dish soap for washing to avoid melting the wax.
- Store in a cool, dark place to prolong lifespan, which can be up to one year with proper care.
- Try creating wraps in various sizes such as 9″x9″ for bowl coverage and 12″x12″ for larger items.
These DIY crafting tips can not only enhance your experience but also ensure that your wraps are both functional and sustainable. With a little practice and attention to detail, you’ll be able to make beeswax wraps that perform wonderfully while reducing your reliance on single-use plastics.
Tip and description chart:
| Tip | Description |
|---|---|
| Start Small | Begin with a small amount of wax and adjust as necessary. |
| Monitor Heat | Use a low heat setting to prevent melting. |
| Choose Fabrics Wisely | 100% cotton is preferable for best results. |
| Washing Advice | Cool water and dish soap will protect the wax layer. |
| Test Sizes | Try out different sizes for various storage needs. |
Cleaning and Caring for Your Beeswax Wraps
Keeping your beeswax wraps in good shape is key to their long life. With the right care, they can last up to two years. This makes them a great choice over disposable plastic wraps. Caring for reusable wraps starts with cleaning them right. Wash them in lukewarm water with mild dish soap.
Don’t use hot or cold water, as it can harm the wax coating. A soft sponge is best to avoid damaging the wrap. After washing, let them air dry. Hang or lay them flat to dry completely before using them again.
It might take some time for them to dry, depending on where you live. But it’s important to dry them well. Always cool down hot leftovers before wrapping them in your beeswax wraps. Heat can damage the wraps.
To keep your wraps in top shape, refresh them when needed. If the wax gets thin, you can re-coat them. Heat them in an oven at 140°C for two to three minutes. Use a compostable parchment sheet during this process.
The mix of beeswax, coconut oil, and tree resin helps keep them clean. But, they will break down and flake a bit with use.
The table below summarizes important maintenance tips for beeswax wraps:
| Action | Recommendation |
|---|---|
| Washing Temperature | Lukewarm water |
| Drying Method | Air dry, hang or lay flat |
| Cleaning Supplies | Mild dish soap, non-abrasive sponge |
| Refresh Method | Re-coat with beeswax in oven |
| Storage | Cool, dry place away from sunlight |
By following these maintenance tips for beeswax wraps, you can make them last longer. They’re a better choice than plastic wraps, which are used once and then thrown away. These wraps are eco-friendly and have natural antibacterial qualities. Take good care of your beeswax wraps to enjoy their benefits for years.
Common Mistakes to Avoid When Making Beeswax Wraps
When you start making DIY beeswax wraps, it’s key to avoid beeswax wrap mistakes that can stop you from succeeding.
Here are some common DIY errors to steer clear of:
- Using Excessive Wax: Too much beeswax makes wraps stiff and less flexible, which can limit their use.
- Uneven Cooling: Not letting the wax cool evenly can cause an uneven texture, making wraps less effective.
- Choosing Synthetic Fabrics: These can melt during the process, resulting in poor results.
- Rushing The Cooling Process: Give your wraps time to set properly; rushing can damage them.
For tips for successful wraps, make sure to wash your fabric first to prevent starch from affecting wax absorption. Use tightly woven 100% cotton for better durability. A mix of beeswax, pine resin, and coconut oil improves adhesion and extends wrap life. Be cautious of discoloration with colored fabrics, and choose lighter colors to reduce staining risks.
Creative Uses for Your Beeswax Wraps
Beeswax wraps are more than just food covers. They bring a green twist to your kitchen.
Here are some creative ways to use them:
- Wrap sandwiches for lunch, ensuring freshness without plastic.
- Cover bowls or dishes in the refrigerator to keep food items preserved.
- Store cut fruits and vegetables, extending their shelf life while reducing waste.
- Shape wraps into small packets for snacks, promoting convenience on the go.
- Create makeshift bowls or containers, perfect for food items at gatherings.
Beeswax wraps can last up to two years with the right care. Wash them gently with warm water (not over 140°F/60°C) and air dry. They’re safe for freezing foods for up to 30 days. The size of the wraps matters; small ones are great for sliced apples, while larger ones fit bowls or bigger items.
Using beeswax wraps instead of plastic bags is eco-friendly. They keep food safe and support a zero-waste lifestyle. As their popularity grows, people find new ways to use them, showing their versatility.
Wrap size and suggested uses chart:
| Wrap Size | Suggested Uses |
|---|---|
| 8×8 inches | Wraps for small items like half an apple or small bowls |
| 11×11 inches | Versatile for wrapping sandwiches and small vegetables |
| 14×14 inches | Covers items like half a watermelon or pie pans |
| 16×16 inches or larger | Used for larger food items or pre-made meals |
Beeswax wraps are biodegradable, making your kitchen eco-friendly. Use them to live stylishly and sustainably. They keep your food fresh and your environment clean.
Conclusion
Making beeswax wraps at home is a great way to go green in the kitchen. They look good and work well, making them a great addition to your kitchen. Plus, they save you money because you can use them for a year if you take care of them.
Beeswax wraps not only keep your food fresh but also help the planet. They keep food fresh longer, which means less waste. By making and using these wraps, you’re helping the environment and showing others how to live sustainably.
It’s a great time to try making your own beeswax wraps. You’ll need just a few things and some simple steps. It’s a fun way to make your kitchen greener and enjoy a more sustainable lifestyle. Let your creativity shine and help make the future greener!
Frequently Ask Questions (FAQ)
What are beeswax wraps and how do they work?
Beeswax wraps are a green alternative to plastic. They’re made from organic cotton, beeswax, jojoba oil, and pine resin. These wraps fit around food and containers, keeping things fresh. They’re also good for the planet because they’re biodegradable.
How long do homemade beeswax food wraps last?
With the right care, your homemade wraps can last up to a year. Washing and re-coating them regularly can make them last even longer.
Can I use any type of fabric for my beeswax wraps?
It’s best to use 100% cotton fabric. It’s breathable and takes the wax well. Don’t use synthetic fibers, as they might melt during the waxing process.
How do I clean my beeswax wraps?
Clean your wraps gently in cool soapy water with a soft sponge. Don’t use hot water or dishwashers, as they can melt the wax.
Can I make beeswax wraps in different sizes?
Yes, you can make wraps in any size you need. Just cut your fabric to the size you want, from small squares to big rectangles.
What are some creative uses for beeswax wraps?
Beeswax wraps are great for more than just covering food. Use them to pack snacks, cover bowls, or wrap sandwiches. You can even make small packets for lunch. Get creative with shapes and sizes!
Are beeswax wraps safe to use with food?
Yes, beeswax wraps are safe for food. They’re made from natural, non-toxic ingredients. They’re a healthier choice than plastic wraps.
How can I make my beeswax wraps more effective?
For the best results, make sure the wax covers evenly. Don’t use too much wax at once. If your wraps feel stiff, you might need to adjust the wax-to-resin mix.


